In today’s digital age, establishing a unique brand identity online is more crucial than ever. A well-defined and consistent brand can set your business apart, build trust, and drive customer loyalty. One of the most effective ways to achieve this is by customizing your WordPress theme to align with your brand’s identity. This guide will walk you through the steps to transform your WordPress website into a true reflection of your brand.
As an Amazon Associate I earn from qualifying purchases and sometimes recommend products from other sellers at no extra cost you. For more details see my disclosure policy and privacy policy.

Understanding Your Brand
Before diving into customization, it’s essential to have a clear understanding of your brand identity. Here are some tips to help you define it:
- Identify Your Brand Values: What does your brand stand for? Consider your mission, vision, and values.
- Know Your Audience: Who are your target customers? Understand their needs, preferences, and behaviors.
- Develop Your Brand Voice: How do you want to communicate with your audience? Determine the tone and style that best represents your brand.
- Create a Visual Style: Decide on your brand’s color palette, typography, and imagery that reflect your brand’s personality.
Choosing the Right WordPress Theme
Selecting a WordPress theme that aligns with your brand’s look and feel is critical. Here are some criteria to consider:
- Design and Layout: Choose a theme that offers the aesthetic and structure you envision for your website.
- Customization Options: Ensure the theme provides sufficient customization features to tailor it to your brand.
- Responsiveness: Opt for a theme that looks and functions well on all devices.
- Support and Updates: Select themes from reputable developers who offer regular updates and support.
Why We Recommend Kadence
We highly recommend Kadence as a lightweight, easy-to-customize WordPress theme, ideal for aligning with your brand’s unique identity. Kadence offers an intuitive interface that simplifies the customization process, even for those with minimal technical skills. Its lightweight design ensures fast loading times, which is crucial for delivering an optimal user experience and improving your website’s SEO performance.
Additionally, Kadence provides a rich set of customization options, from headers and footers to typography and color schemes, allowing you to create a cohesive and professional look. The theme’s responsive nature guarantees that your site will look stunning on any device, ensuring consistency and accessibility for all visitors. Plus, with robust support and regular updates, Kadence stands as a reliable choice for maintaining a high-performing, brand-consistent WordPress site.
If you are interested in having Kadence on your website, reach out to chat more about our theme change services.
Customizing Your Theme
Once you’ve chosen the right theme, it’s time to customize it. Here are some tips to help you make the most of Kadence’s features:
- Branding Your Header: Use Kadence’s header builder to create a unique and branded header for your site.
- Designing Your Layout: Utilize Kadence’s layout options to create a visually appealing, functional, and consistent design throughout your website.
- Choosing Your Fonts: Select from a vast library of Google fonts or upload your own custom fonts to create a unique typography style for your brand.
- Customizing Colors and Styles: Use Kadence’s global color picker and styling options to maintain consistency across all elements of your site, from buttons and links to headings and backgrounds.
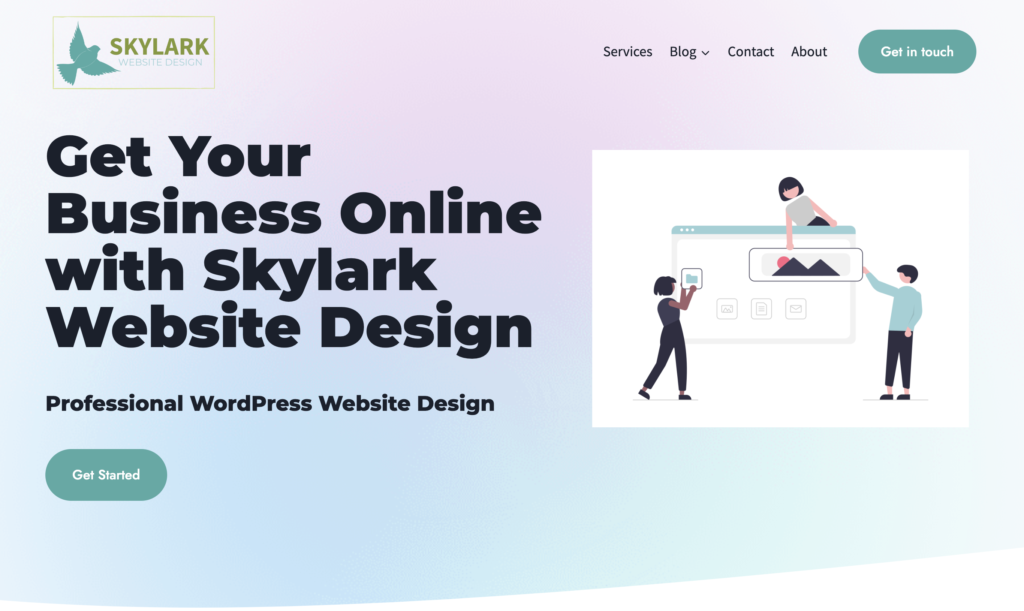
Custom Headers
Uploading a custom header image or logo is a significant step in aligning your website with your brand identity. A custom header instantly conveys your brand’s visual identity to visitors. Here’s how to do it:
How to Upload a Custom Header
- Go to your WordPress dashboard.
- Navigate to Appearance > Customize.
- Select the Header section or Site Identity (depending on your theme).
- Upload your custom header image or logo.
Additional Tips
- Image Quality: Ensure the image or logo is high resolution for a professional appearance.
- Brand Consistency: Choose an image that aligns with your brand’s color palette and style.
- Header Layout: Some themes allow you to adjust the header layout, including the positioning of the logo and menu items.
Colors and Fonts
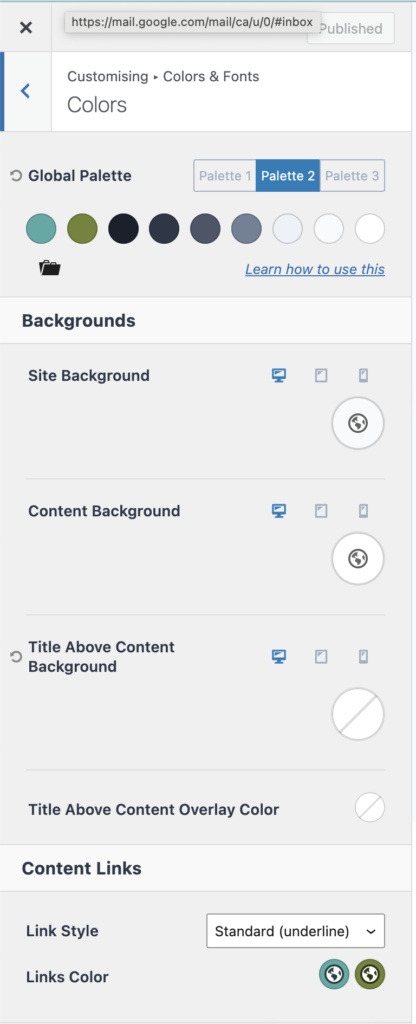
Matching your site’s color scheme and typography to your brand guidelines is essential for a cohesive look. Consistent use of colors and fonts reinforces brand recognition and enhances the user experience.
How to Adjust Colors and Fonts
- Access the WordPress dashboard.
- Go to Appearance > Customize.
- Look for sections labeled Colors, Typography, or Theme Options.
- Adjust the primary and secondary colors to match your brand’s color palette.
- Select fonts that align with your brand’s style and readability standards.
Additional Tips
- Accessibility: Ensure sufficient contrast between text and background colors for readability.
- Font Pairing: Use no more than two to three font styles to maintain a clean look.
- Consistency: Apply the same colors and fonts across all pages for uniformity.
Menus and Widgets
Well-configured menus and strategically placed widgets enhance user navigation and highlight essential content, making it easier for visitors to interact with your site.
How to Configure Menus
- In the WordPress dashboard, go to Appearance > Menus.
- Create a new menu or edit an existing one.
- Add essential pages, categories, or custom links to the menu.
- Assign the menu to the appropriate location in your theme.
Additional Tips
- Menu Items: Prioritize important content and ensure it is easy to find.
- Dropdown Menus: Use dropdown menus for subcategories to keep your site organized.
- Navigation Labels: Use clear and concise labels for menu items.
How to Configure Widgets
- In the WordPress dashboard, navigate to Appearance > Widgets.
- Drag and drop widgets into the designated widget areas (e.g., sidebar, footer).
- Customize each widget to display content such as recent posts, social media feeds, or custom HTML.
Additional Tips
- Relevance: Choose widgets that provide value and enhance the user experience.
- Placement: Position widgets in areas where they will be most effective without cluttering the layout.
- Updates: Regularly update widget content to keep it fresh and engaging.
By following these steps, you can ensure that every aspect of your WordPress theme is customized to reflect your brand, creating a strong, professional online presence.
Testing and Feedback
After customizing your theme, it’s crucial to test its appearance and functionality across different devices:
- Cross-Device Testing: Use tools like BrowserStack to ensure your website looks great on desktops, tablets, and smartphones.
- Audience Feedback: Gather feedback from your visitors to understand their user experience and make necessary adjustments.
SEO Considerations
Customization doesn’t just improve aesthetics; it also impacts your SEO:
- Site Speed: Ensure your customizations don’t slow down your site. Use plugins like W3 Total Cache to improve performance.
- Mobile-Friendliness: A responsive design is vital for SEO. Google prioritizes mobile-friendly sites in search rankings.
- Meta Tags and Descriptions: Customize your meta tags and descriptions using SEO plugins like Yoast SEO to improve visibility in search results.
Conclusion
Customizing your WordPress theme is a powerful way to enhance your brand’s online presence. By aligning your website with your brand identity, you create a consistent and professional image that resonates with your audience. Start customizing today and transform your WordPress site into a true reflection of your brand.
Have you customized your WordPress theme? Share your experiences and tips in the comments below!