
The Gutenberg editor, also known as the Blocks Editor, was the big change for WordPress that was released in December 2018. This was a complete change to the way you create posts inside WordPress, and I’ll admit, at first, I had a few teething problems.
As an Amazon Associate I earn from qualifying purchases and sometimes recommend products from other sellers at no extra cost you. For more details see my disclosure policy and privacy policy.
But now, there has been a lot of work put in on Gutenberg and I’m giving it another try. So far so good, I can easily create new posts in it. But what about older posts? How do you update old posts in the Gutenberg editor?
What is the Gutenberg editor?
The Gutenberg editor was WordPress’ attempt at falling in line with website builders such as Squarespace and Wix where everything is built with blocks. They created a new editor to build your posts or pages and it was named Gutenberg.
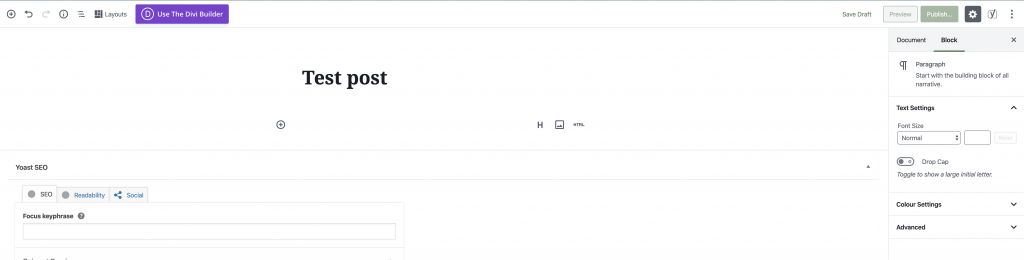
As a Divi user, the idea of Gutenberg wasn’t an alien one. Rather than having a single Word document like screen to add your blog post, you have blocks. You can still copy and paste your content into the editor, and it will automatically assign the right kind of block to it (or most of the time). Some of the types of blocks include:
- Text (paragraph)
- Image
- Button
- List
- Table
- Gallery
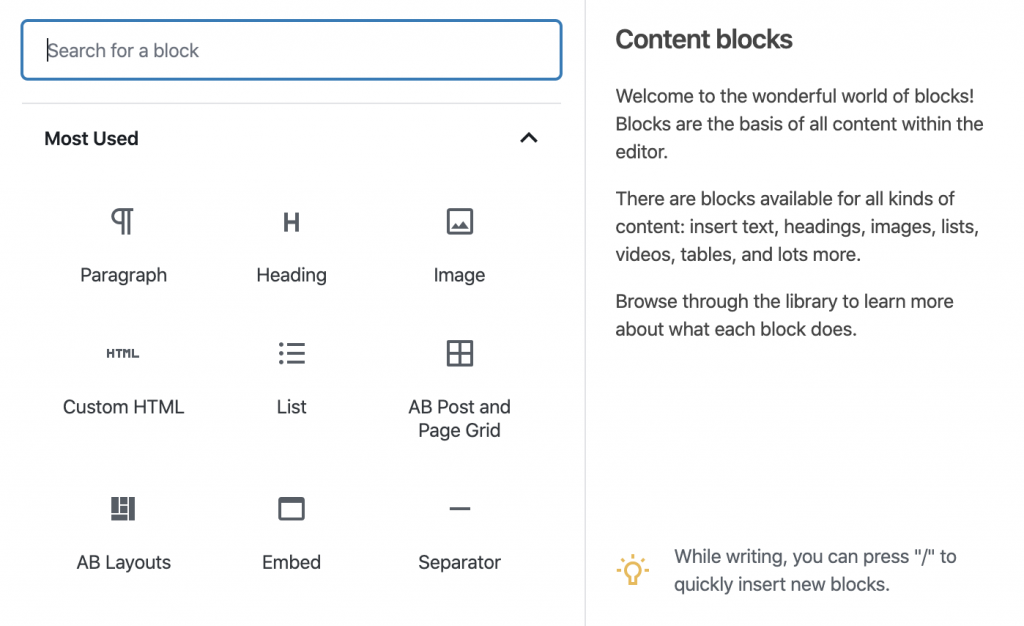
There are also specialist blocks. For example, I use Tasty Recipes on my food blog and there’s a block just for that, so the recipe process works just the same. Other plugins are also creating their own blocks to offer the full functionality.
Additional functions
As Gutenberg has developed and become more reliable and less prone to causing problems, the number of blocks created by WordPress and third party providers has also increased.
For example, you can use the Custom HTML if you are grabbing an affiliate link image from Amazon – just pop the code in and the image will appear. You can also add short codes and there’s a code block.
There are also fun things like separators, spacers and page breaks to help break up your content and add space where needed. I’ve found I use s separator between the end of the content and the related posts block just to format nicely.
Third party blocks
There’s no surprise that third party providers have also started to create blocks that you can use in Gutenberg. These allow you to add yet more functions to your website. So far, I’ve started using them from Atomic Blocks and I’m really impressed.
The related posts block you see at the bottom of the page is one of theirs. It allows you to easily create that distinctive related posts section, choose what shows, what category, how many posts and more.
In addition, they currently have blocks for:
- Advanced columns for full page layouts
- Pricing table blocks for products or services
- Sharing icons block
- Author profile block
- Customisable buttons
- Spacer and divider
- Drop cap block

Some of these duplicate the blocks built into Gutenberg but have slightly different features. But others are completely different and that makes it worthwhile adding the plugin in my opinion. There are other providers of third party blocks that I haven’t tried yet.
How to start adding blocks
It is definitely worth playing around with the basics of blocks before you start looking to update old posts. That way you will have an idea what to expect and what kind of blocks you may want to use.
When you first start a post, you will see the space for the header and a + symbol. There are a few ways to go from here. You can paste content in beside that first + and the system will allocate it to the right blocks. In many cases, this will be the basics such as paragraphs, headers, lists and tables.
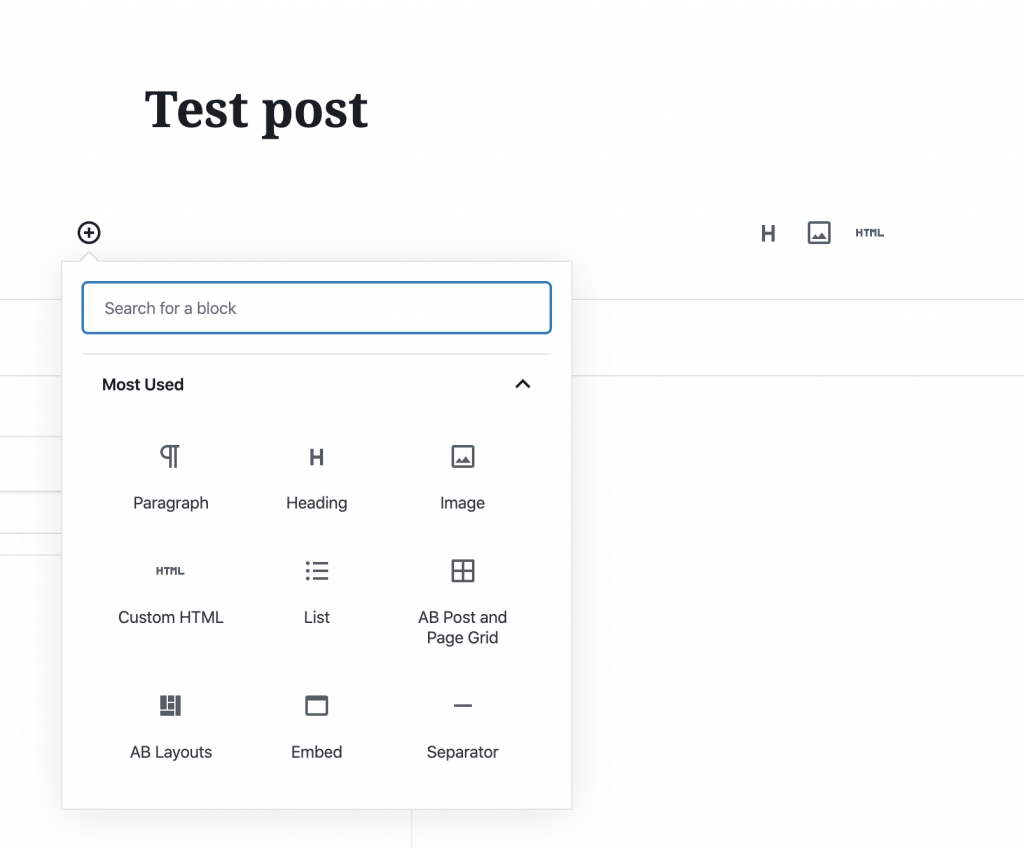
Another way is to select the block you want and start adding content directly into it. I must admit I always write in Word then paste into WordPress, but I know other people like to do it straight into the editor. You can either use the + symbol to start adding a block or the same symbol in the top left corner to access a list of blocks to get started.
Updating old posts to the Gutenberg editor
One of the first things I wondered about when I tried it was how to update old posts to the Gutenberg editor. What’s the point of having blocks if you can’t use them? And the process is relatively simple.
For starters, when you first open an old post with Gutenberg, the whole thing is in one big block. Just click the three dots at the top of the editor and you can convert this to blocks – in other words, WordPress will change the content into a series of blocks such as paragraphs or lists based on its content. Once it is changed into blocks, you can then move them around, edit them individually or make changes to the internal layout of each block.
Each block also has its own settings which you can change such as the size of an image, the link to another page, the ALT text and more. Then once you are finished editing, simply update the post and it will now be in Gutenberg – unless you switch it off and go back to the Classic Editor in which case it will revert to the old way.
Individual block features
As well as its own settings, there are also features within each block that give you more ways to personalise them and get just what you want from them.
For example, let’s say you want to create a table – there’s a block for that. You can set how many columns and how many rows then create the table. Once you have done this, you can click the block style which looks like two circling arrows to access the styles available. At the moment, there is the default plain style and a stripes option to alternate colours on each row.
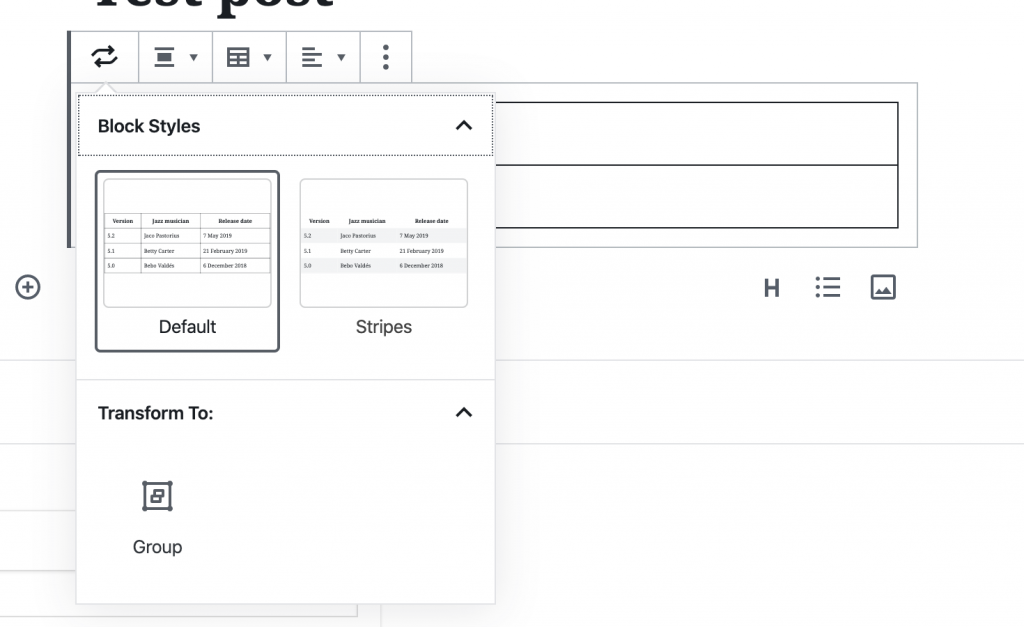
You can also access the settings options in the side bar. Using the table example, there’s the option to have a fixed width table cell, header and footer section as well as colour options and even CSS. Plus, the options to change the table style.
Each block can have its own settings and options within that first button. So, when you use them, give it a click to see what’s there. From circle shapes for images to different styles of pull quotes, there’s all sorts of ways to make your website more ‘you’.
Reorganising blocks
Another great feature when updating those old posts into Gutenberg is the ability to move blocks around. You can even group them together and move the whole block.
There are up and down arrows on each block to allow you to move it where you need it to go. If you highlight a group of blocks, you can then click the three dots and group these. When you use the move arrows, the whole block will then go up or down.
Reusable Gutenberg blocks
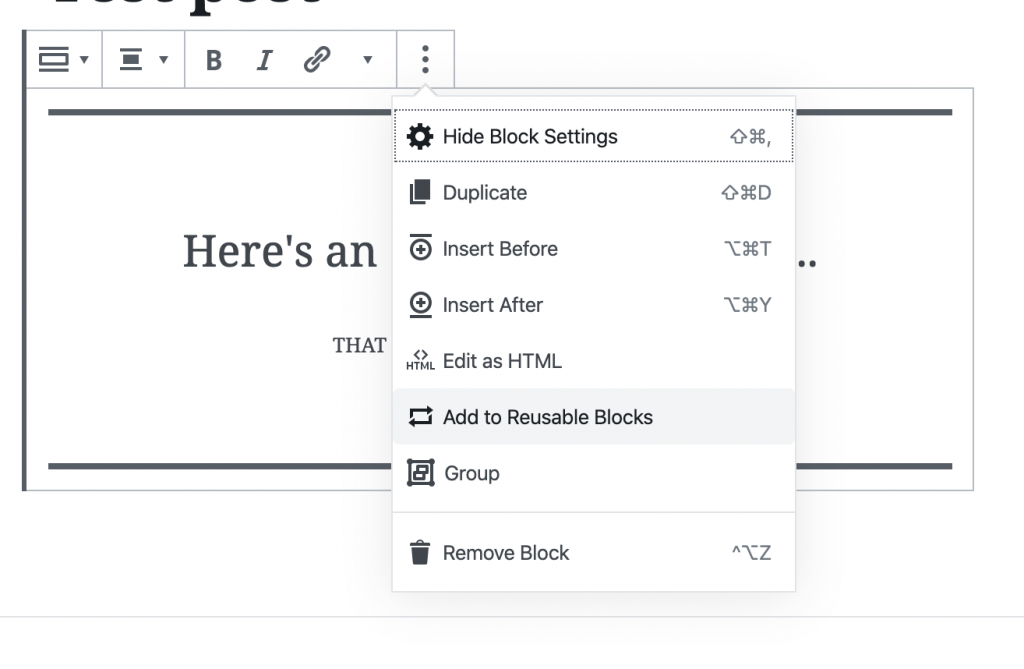
Another handy feature of Gutenberg that reminded me of things I see in Divi is the reusable block. Let’s say you like to use a quote in your post with a pale green background. You can easily create a block that looks like that and save it as a reusable block.
Give it a name then when you have done this and add a new block, a section for reusable blocks will be added. Grab the one you want and away you go!
How long will the Classic Editor be around?
If you fin Gutenberg intimidating or run into an issue with your theme, don’t worry, you have some time. WordPress have said that they will continue to have the Classic Editor around until 2022. It is available as a stand-alone plugin in the plugin section and then you can continue to use it as you like.
You can set your website to default to one or the other, depending on what you want to do. And if you create in Classic then want to go block style, just follow the process above to make the switch.
Worth making the switch
The more I use the Gutenberg editor, the better I like it. There are lots of features, settings within the blocks to make more of them and new blocks appearing all the time. So, when you next update an old post, go Gutenberg and start to see the difference!